How to Set a Retention Policy in Microsoft 365
Setting up a retention policy allows you to effectively manage the lifecycle of corporate data, ensuring it is retained for the necessary time and automatically deleted when no longer needed.
Purpose of a Retention Policy
In Microsoft 365, a retention policy enables you to:
- Retain data for a specified period to meet business or regulatory requirements.
- Automatically delete data after the defined period has passed.
- Prevent deletion of data when required for legal or compliance reasons.
Supported Services
Retention policies can be applied to the following services:
Exchange, SharePoint, OneDrive, Microsoft Teams, Microsoft 365 Groups, Viva Engage, Microsoft Copilot, and Public Folders.
Prerequisites
To create a retention policy, you must have either Global Administrator permissions or a role with specific Purview permissions (e.g., Compliance Administrator).
Step-by-Step Procedure
Access Microsoft Purview
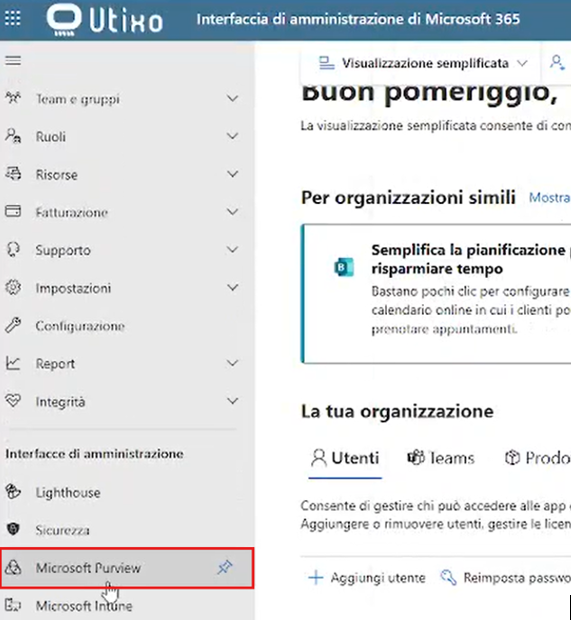
From the Microsoft 365 admin center, select Microsoft Purview from the left-hand sidebar.
Navigate to Data Lifecycle Management
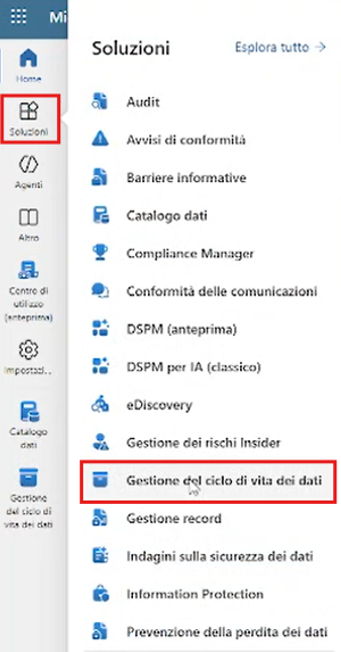
In the left navigation panel, go to Solutions > Data Lifecycle Management.
Create a New Policy
Click on Policies and then select Retention Policies.
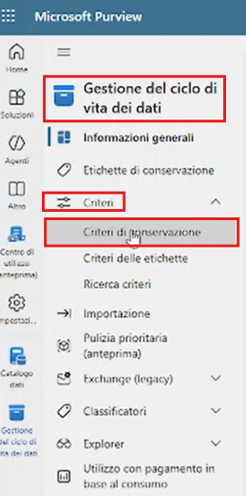
Then click on + New retention policy to launch the setup wizard.

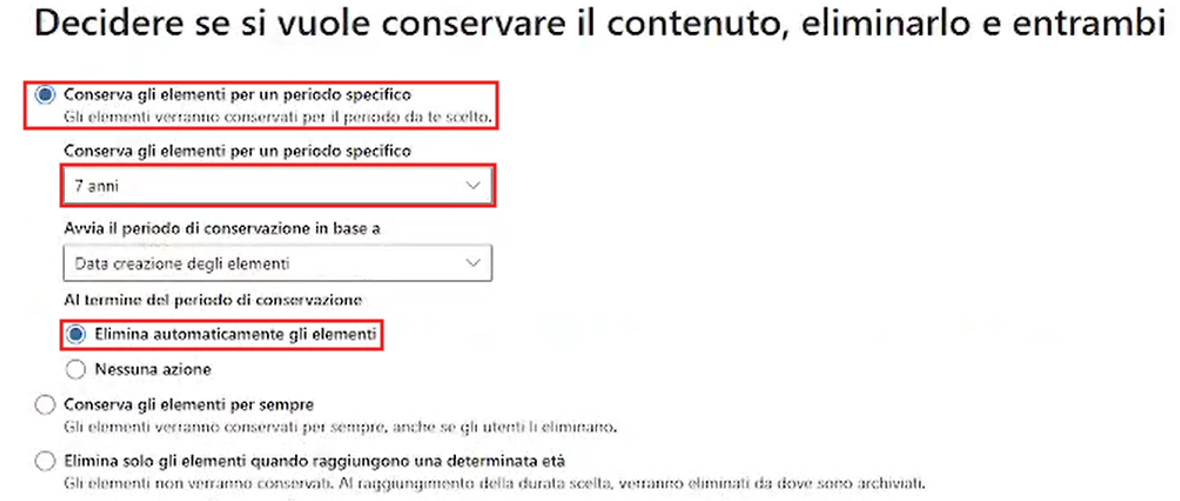
Policy Configuration
- Enter a unique name and, optionally, a description. Click Next after each step.
- Choose between:
- Static: manually select locations.
- Adaptive: dynamically updates based on user attributes. Requires E5 license.
- Enable the desired services and define the scope using the Included and Excluded columns. Click Edit to select or remove specific users, sites, or groups.
Final Step
Review the policy configuration summary. If everything is correct, click Submit to apply the policy.
