
Configure Google Workspace MX Records Using cPanel
This article provides the values you can use in your domain's DNS settings to configure MX records for Gmail with G Suite, now called Google Workspace.
Each record points to a Google mail server. You will also find important information about configuring mail server priorities.
Enter these values in your domain's DNS management panel, not in the Google Admin Console. If you experience any issues, contact Utixo support, and our team will help you configure the settings correctly.
Note. The configuration example below is based on cPanel. Other hosting providers may use different control panels and settings, although the basic procedure remains the same.
Make sure you follow your domain hosting provider's specific instructions when entering these record values.
Follow these instructions:
-
Log in to your cPanel account.
-
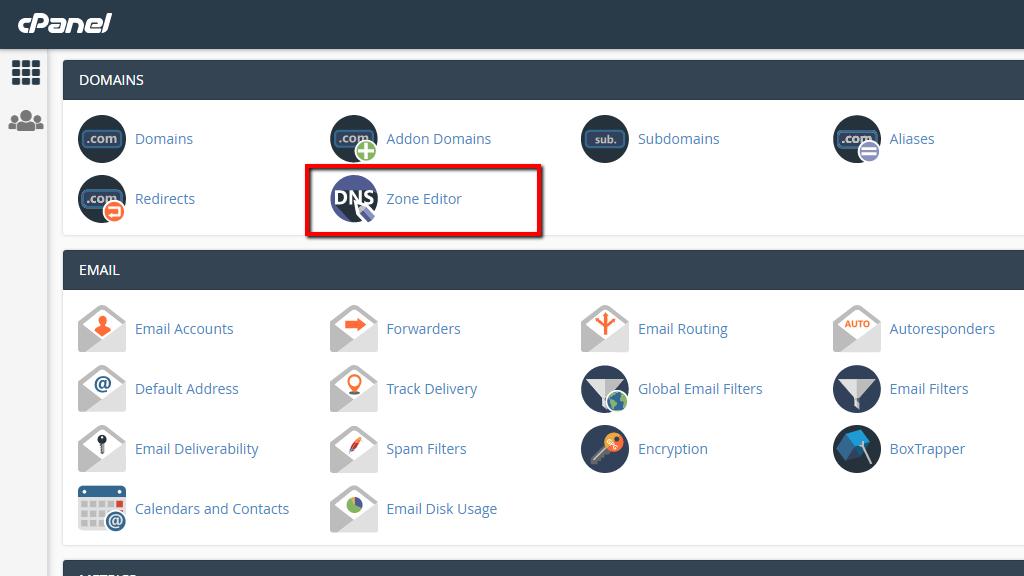
Find the "Zone Editor" feature, as shown in the image below.
-
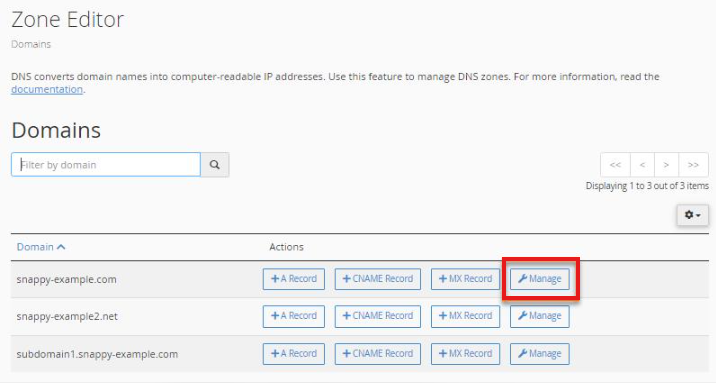
Click "Manage".
-
Delete any existing MX records.
-
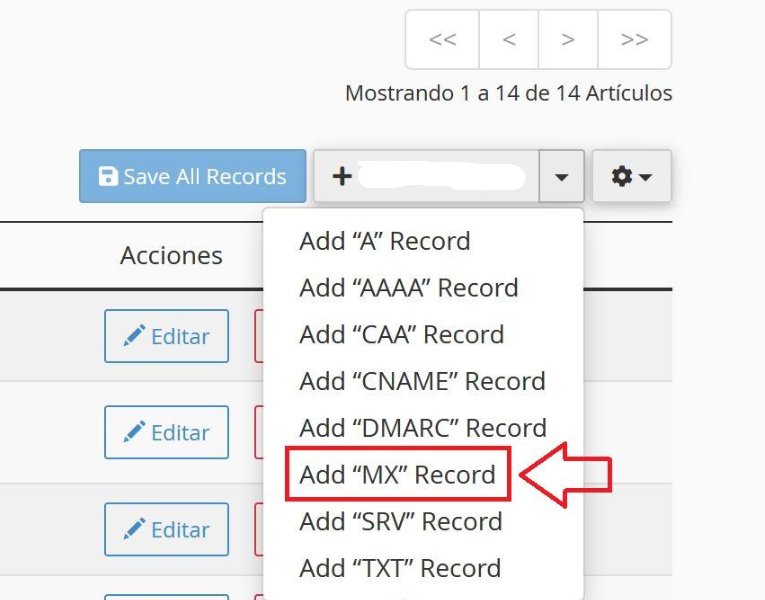
Use the "Add Record" function and select MX.
-
Enter the records as shown in the table below:
| Priority | Destination |
|---|---|
| 1 | ASPMX.L.GOOGLE.com |
| 5 | ALT1.ASPMX.L.GOOGLE.com |
| 5 | ALT2.ASPMX.L.GOOGLE.com |
| 10 | ALT3.ASPMX.L.GOOGLE.com |
| 10 | ALT4.ASPMX.L.GOOGLE.com |
- Click Save.
Congratulations! Your MX records are now configured to direct email to Google. Please note that MX record changes may take up to 48 hours to propagate across the Internet.
Remember to add the following include mechanism to your SPF record:
include:_spf.google.com
To verify that your DNS configuration is correct, use Google's diagnostic tools: https://toolbox.googleapps.com/
