WHMCS AffiliateTools – Installation and Configuration Guide
AffiliateTools is a WHMCS addon module designed to enhance affiliate and service manager functionalities. Follow the steps below to install and configure it properly.
1. Download the module
Log in to your Client Area, go to Services, and click on the AffiliateTools product.
In the Overview panel on the left, click Download to get the package.
2. Extract and upload
Unzip the .tar.gz archive, open the folder corresponding to your PHP version (e.g., 5.6, 7.1, 7.2+), then upload the affiliatetools folder into ./modules/addons/ inside your WHMCS installation directory.
3. Activate the addon
From your WHMCS admin panel, navigate to Setup → Addon Modules, locate AffiliateTools and click Activate.
4. Initial Configuration
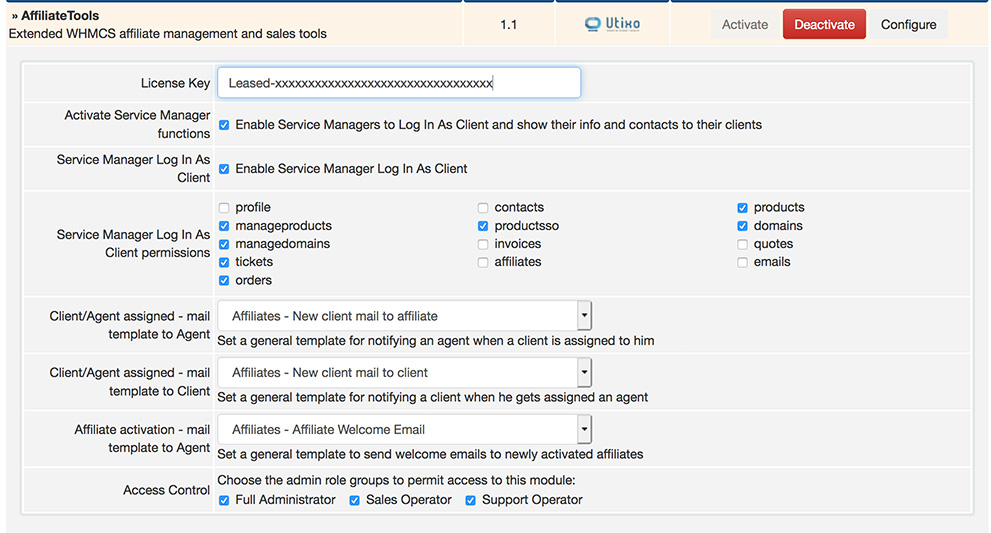
Click Configure to access module settings:
- License key: paste the key provided at the time of purchase.
- Enable Service Manager features: disable if you don't want to use this role. Disabling will hide service manager info from clients and block login-as-client for managers.
- Service Manager Login-as-Client: if enabled, you can restrict this login functionality separately.
- Access permissions: define which WHMCS features are accessible when service managers log in as clients.
Note: WHMCS doesn't sync changes made to settings after the links between Clients and Managers are created. Configure everything carefully beforehand.
Email template configuration
- From client to manager: the system creates a template called Affiliates – New Client Email to Affiliate. You can modify or replace it with another WHMCS template.
- From manager to client: the template Affiliates – New Client Email to Customer is created. It includes the service manager’s name and contact details.
Both templates are generated automatically during addon activation.
