Creating a CSR on a Windows 2016 server
- In the Windows Start menu, type Internet Information Services (IIS) Manager and open it.
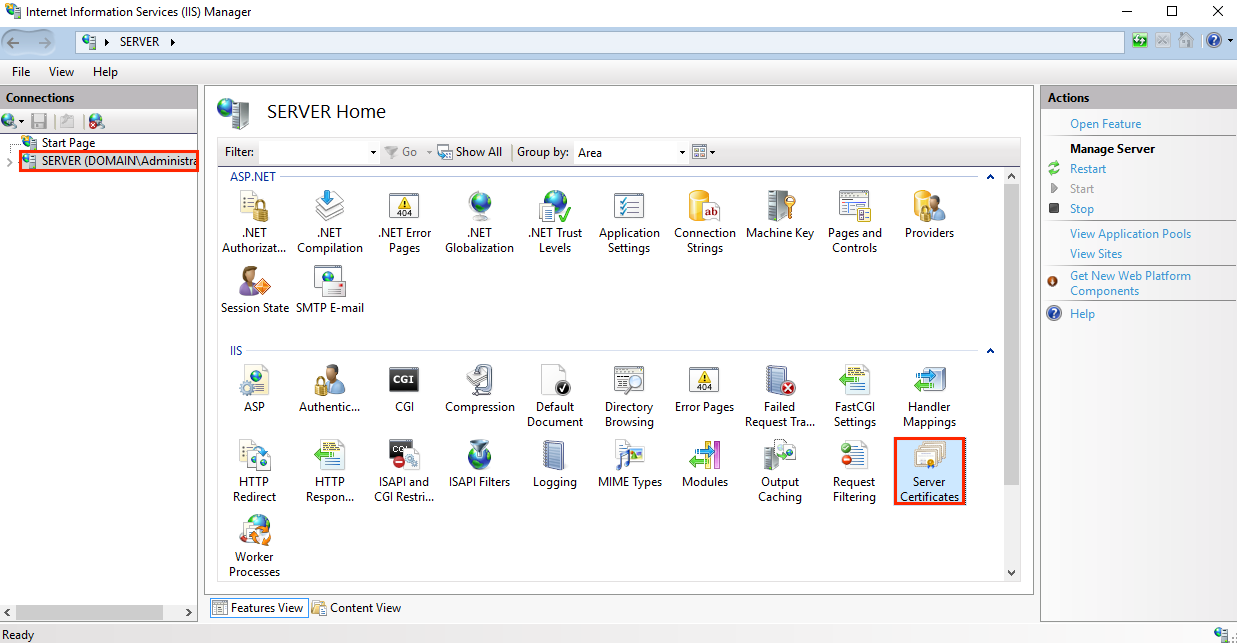
- In Internet Information Services (IIS) Manager, in the Connections menu tree (left pane), locate and click the server name.

- On the server name home page (middle pane), in the IIS section, double-click Server Certificates.
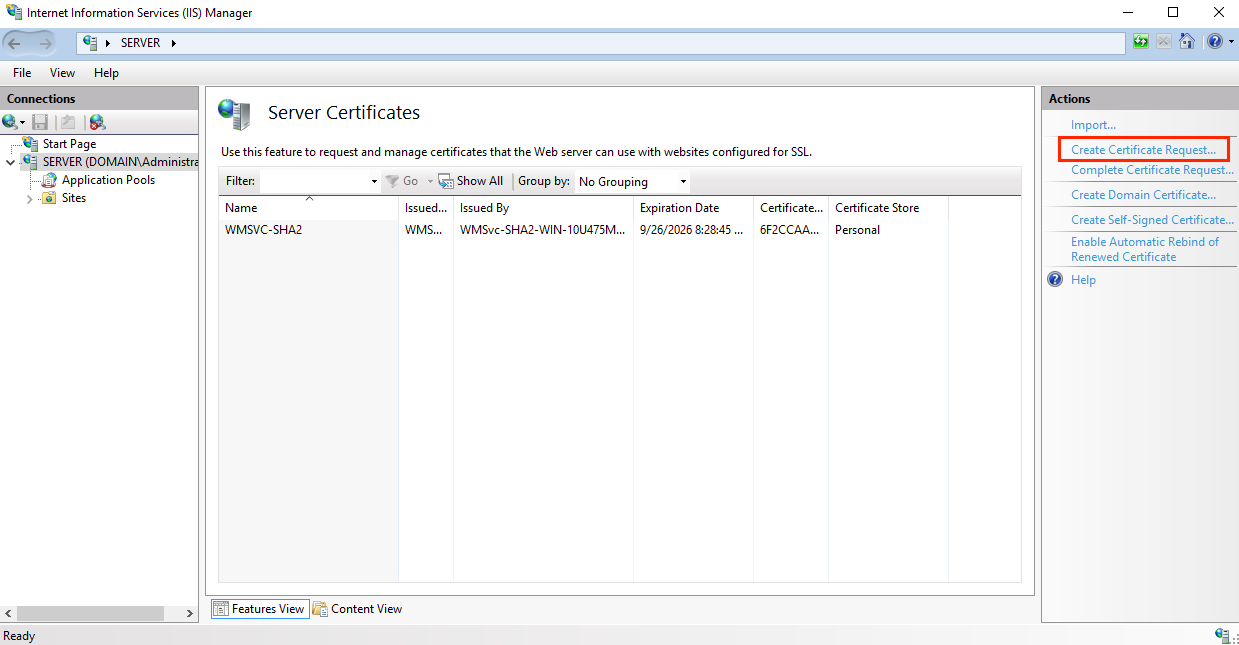
- On the Server Certificates page (middle pane), on the Actions menu (right pane), click the Create Certificate Request link

- In the Request Certificate wizard, on the Distinguished Name Properties page, provide the following information and then click Next:
Common Name:
Type the fully qualified domain name (FQDN) (eg www.example.com).
Organization:
Type in the legally registered name of your company (eg YourCompany, Inc.).
Organizational Unit:
The name of your department within the organization. Often this entry will be listed as "IT", "Web Security"
or is simply left blank.
City / Locality:
Type the city where your company has its registered office.
State / Province:
Type the state / province in which your company is legally located.
Village:
In the drop-down list, select the country where your company is headquartered. - On the Cryptographic Service Provider Properties page, provide the information below, and then click Next.
Cryptographic
From the drop-down list, select Microsoft RSA SChannel Cryptographic Provider, Service Provider
:
Unless you have a specific cryptographic provider.
Bit length:
In the drop-down list, select 2048, unless you have a specific reason
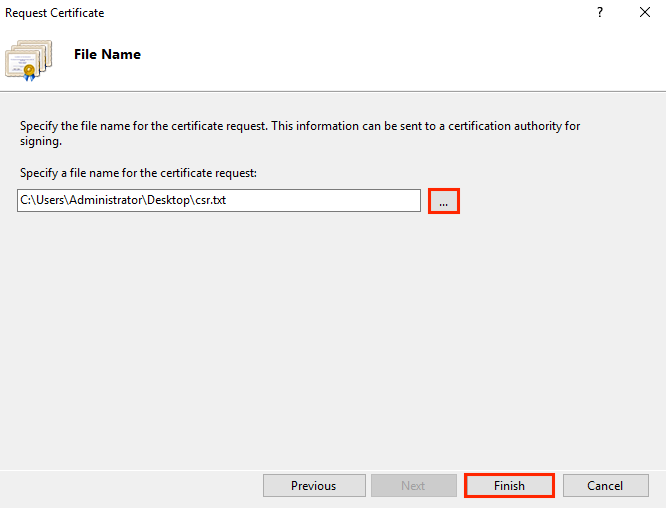
for opting for a longer bit length. - On the File Name page, under Specify a file name for the certificate request, click the… box to navigate to a location where you want to save the CSR.
Note: Remember the name of the file you choose and the location where you save your csr.txt file. If you simply enter a filename without navigating to a location, your CSR will end up in C: \ Windows \ System32.
- When finished, click Finish.
- Use a text editor (such as Notepad) to open the file. Then, copy the text, including the ----- BEGIN NEW CERTIFICATE REQUEST ----- and ----- END NEW CERTIFICATE REQUEST ----- tags and use it in the Utixo control panel.

